Tag Archives: vegan

Cauliflower Quiona Salad

Last week at work I attended a retirement lunch.  The lunch was held at White Spot. TRAUMA.  The invite email had a link to their menu and I discovered they had some interesting salads, so I thought maybe this won’t be too bad.

IT WAS BAD. REAL BAD. The cauliflower on the salad tasted like they didn’t know how to defrost frozen vegetables.

However, the traumatizing experience of eating White Spot salad inspired me to get creative with salads at home (mostly just to burn the flavour of white spot food out of my mouth forever).

Image

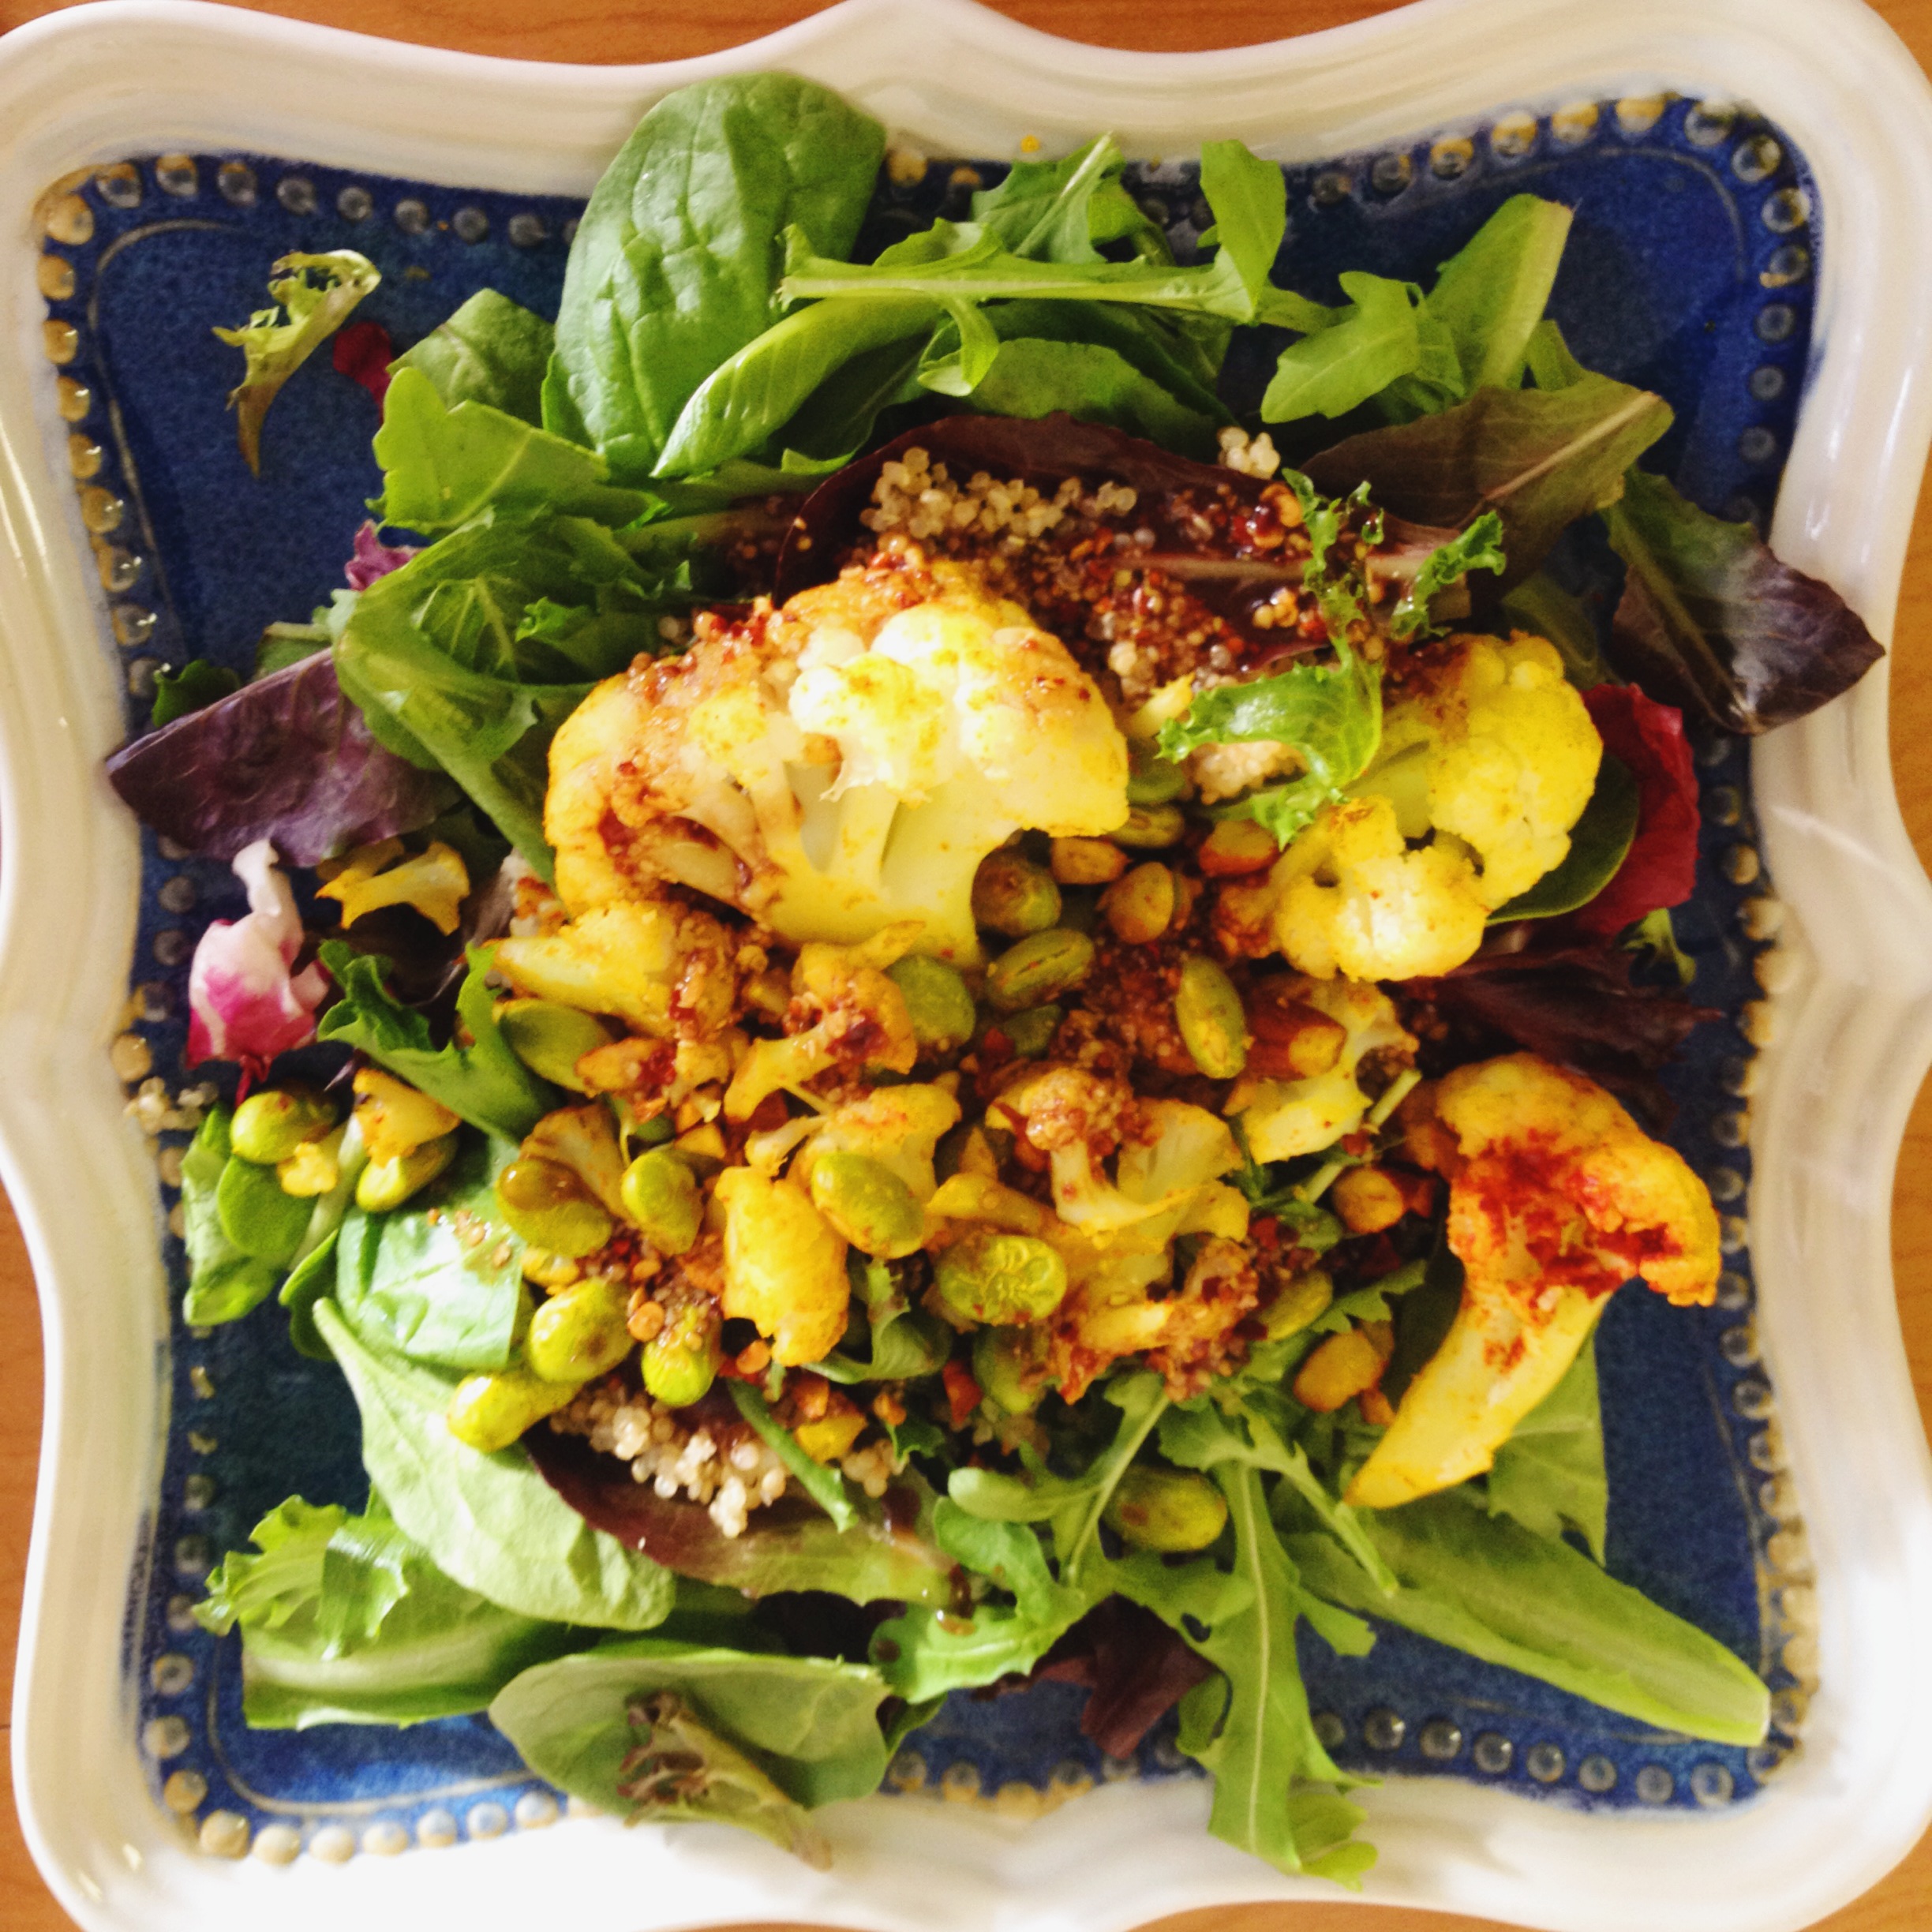
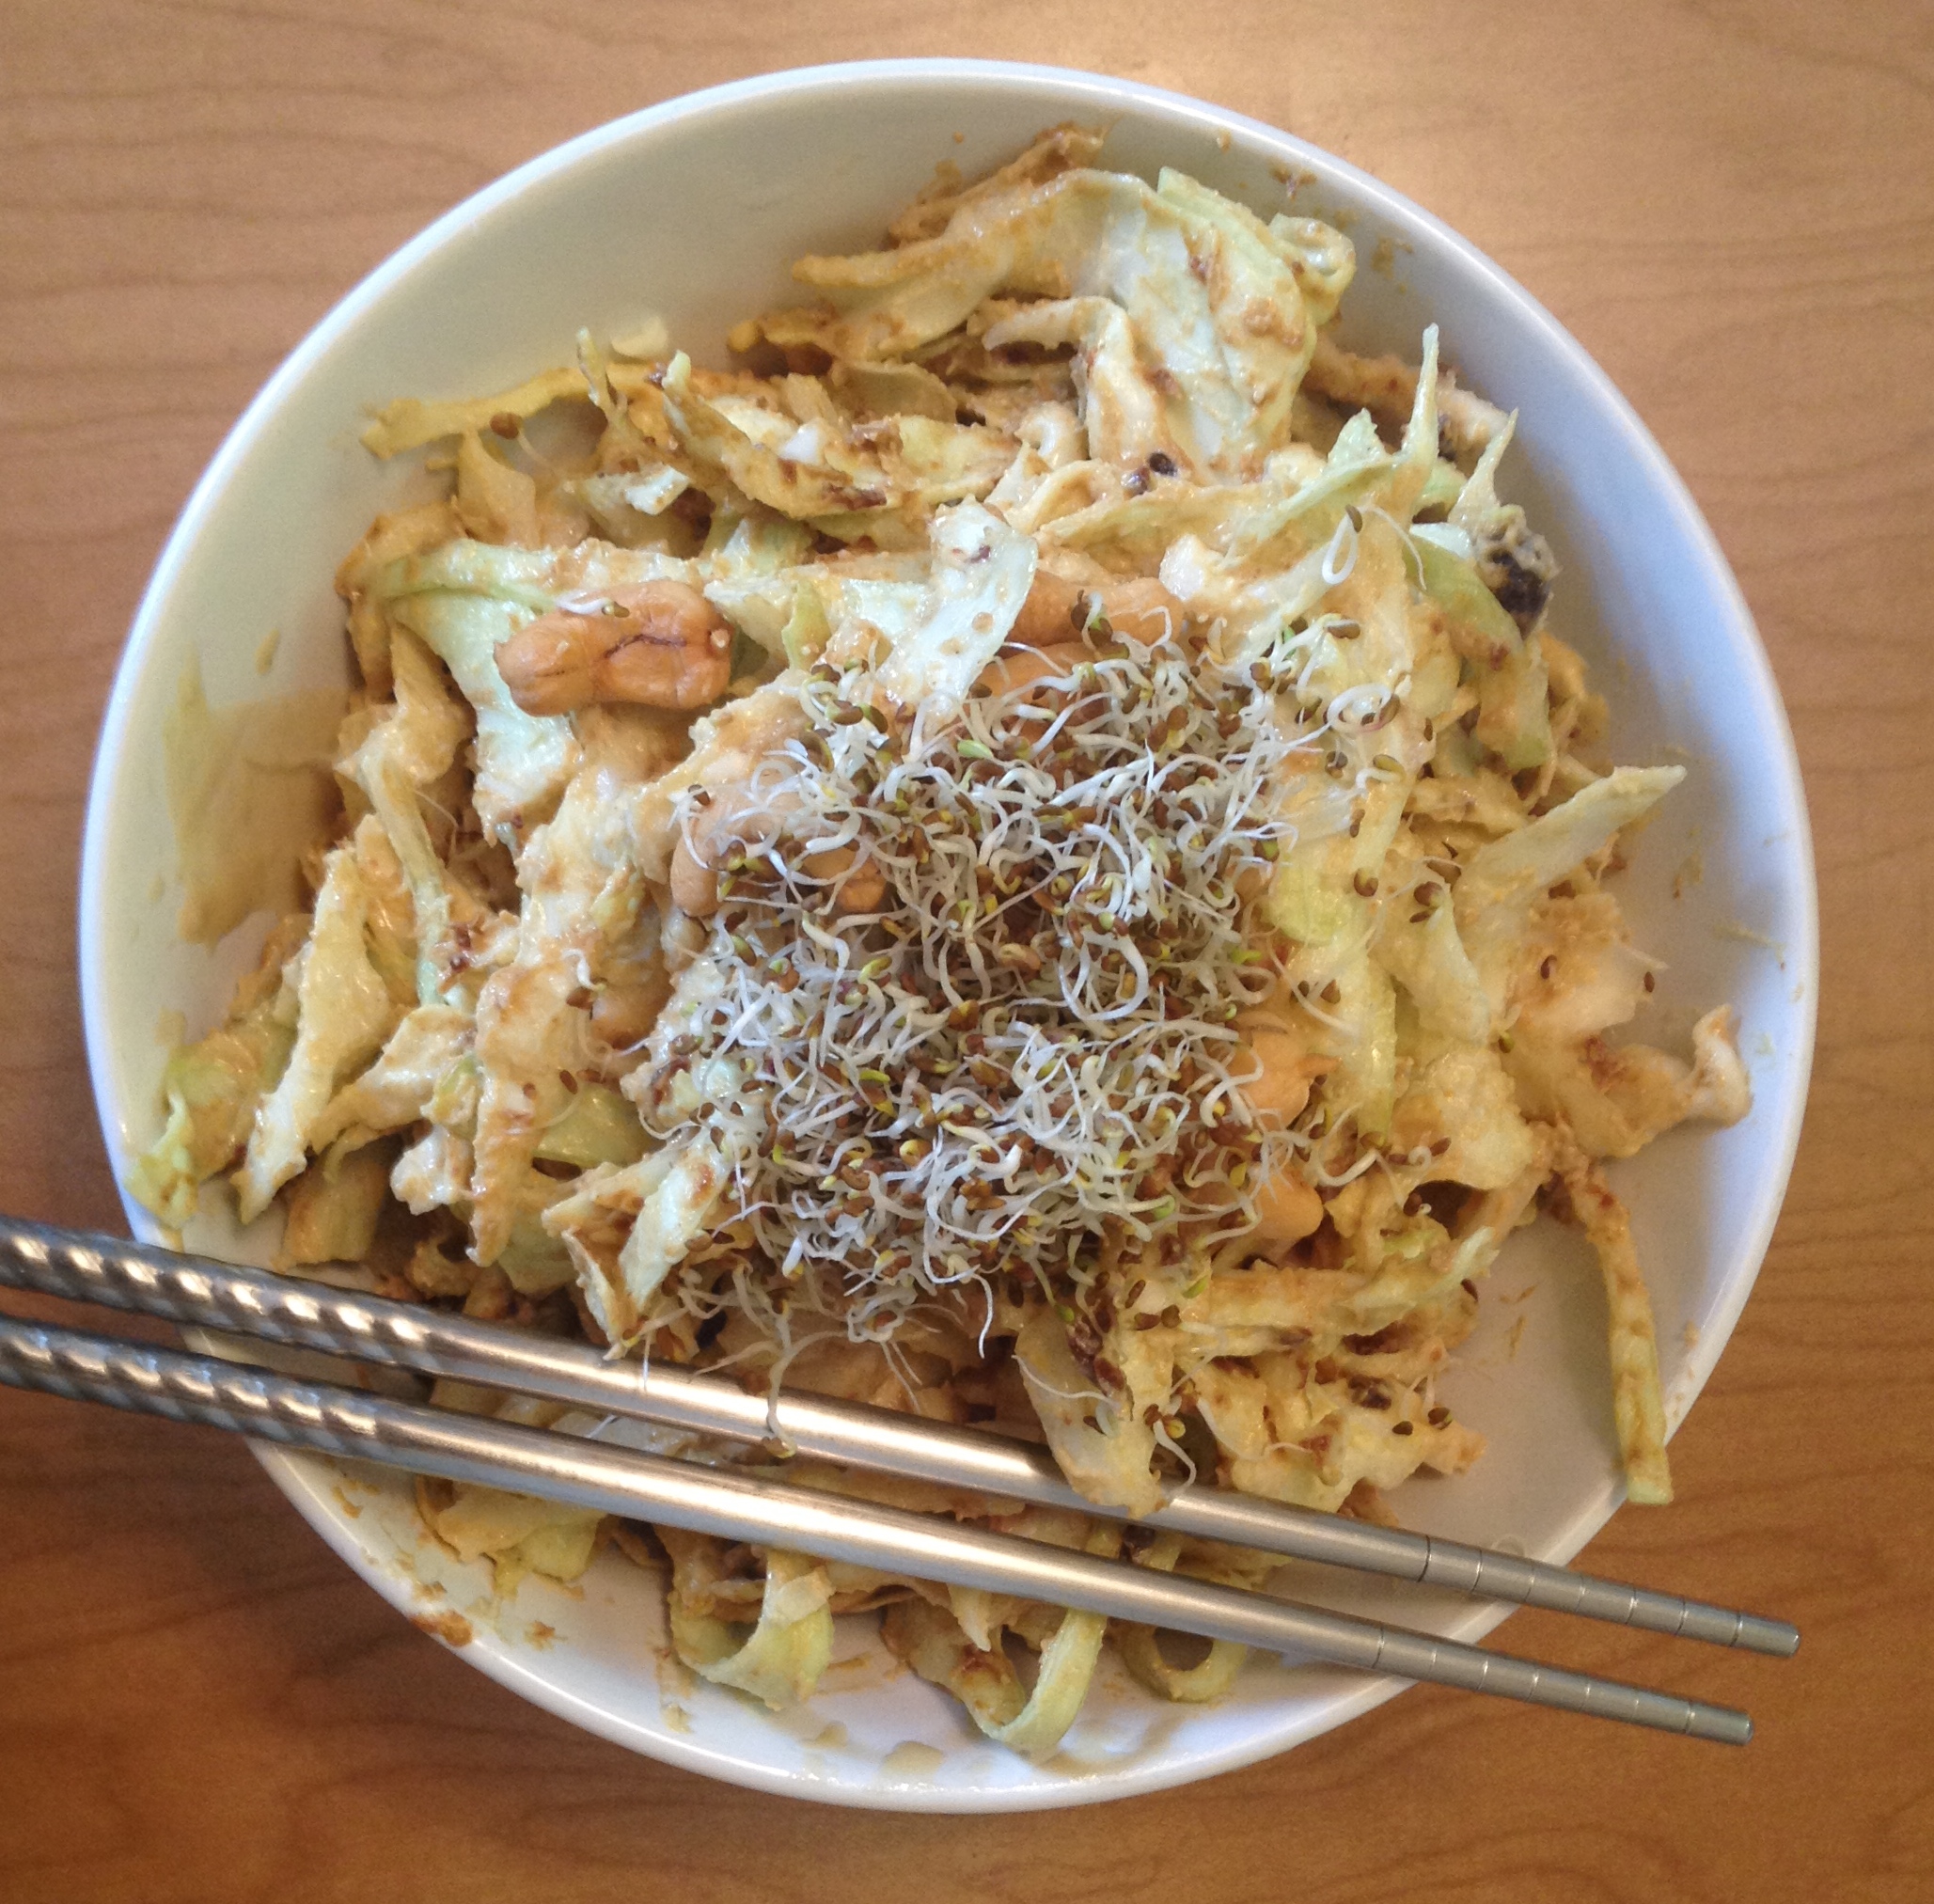
I made a cauliflower, quinoa salad with leafy greens, and it was lovely. My cauliflower was well cooked and did not send shivers down the person ingesting its spine (I’m looking at you White Spot).  Usually, when I have had quinoa salad the ratio of quinoa to vegetables has been equal, but in this salad the quinoa is more of a top garnish which is actually a really nice way to use it!

Salad

  • 1/3 cup quinoa
  • 1/2 cup edamame (I used frozen)
  • 1 pack leafy greens
  • 2 TB chopped almonds
  • 1 cup chopped cauliflower
  • 1/4 tsp tumeric, paprika  and salt

Dressing

  • 1/4 balsamic vinegar
  • 2 TB honey mustard
  • 1/2 tsp red pepper flakes
  1. Steam the heads of cauliflower for around 5 minutes, you don’t want it to become to mushy.
  2. Fry the cauliflower in 1/2 TB coconut oil with the tumeric, paprika and salt. Add your chopped almonds, and cook until nicely toasted. Set aside to cool.
  3. Bring 1/3 cup of quinoa with 2/3 cups of water to a boil, and then let simmer for 10-15 minutes.
  4. Cook your edamame according to package.
  5. Mix all the ingredients of the dressing together and adjust flavours to please your taste buds
  6. In a salad bowl prepare the greens, then add the quinoa, edamame, and cauliflower mix. Add the dressing to taste.


Creamy Cabbage Salad

Cabbage is one of my fav vegetables because it is cheap, delicious and super good for you! It’s also hella low in calories (not that I believe in counting calories or anything like that), but since it is so low cal you can pair it with a nice creamy dressing and not feel guilty.  I haven’t had coleslaw in years because it’s the creepiest salad ever, usually it has so much mayonnaise on it that it sort of slips and slides around your plate (not appealing), but this salad is like coleslaw after a makeover.

Image

Creamy Cabbage Salad

  • 1/2 cabbage (I used green but red would probs be awesome also)
  • 1/4 cup tahini
  • 1/4 dijon mustard
  • 1 TB miso paste
  • 2 TB cashews
  • sprouts (for garnish)
  1. Wash and chop your cabbage into ribbon like slices
  2. Mix the mustard, tahini and miso together.  Add to the cabbage and mix well.
  3. Garnish with cashews and sprouts

In this recipe the tahini creates the creamy texture and flavour usually achieved with mayonnaise but minus the unholy slimyness (I’m aware that is not a proper word).

Best Breakfast

When I first heard of tofu scramble to replace eggs I was like; “nahhhhhhh” that sounds disgusting, I can live without having a classic breakfast ever again.  WELL, I was wrong y’all, very wrong.  Tofu scramble is surprisingly delicious, it doesn’t have the slimy texture I imagined it would.  It also is not any more difficult to make than cracking an egg is! I made my tofu scramble curry flavoured just to make it more exciting as tofu can be a bit bland.   Image

My full meal was tofu scramble with yam and potato hashbrowns, fried tomatoes and cornbread.

IT WAS REALLY GOOD. Just saying.

Tofu Scramble

  • 1 package extra firm tofu (if your tofu is soft you may get the undesired slimy texture)
  • 2 TBS nutritional yest
  • 1 tsp curry powder
  • 1/4 tsp salt and pepper
  • tsp coconut oil (for the pan)

Take the tofu and break it up into chunks with your hands. Add the rest of the ingredients except the coconut oil and mix until yellow, don’t over mix the tofu. Heat a frying pan with coconut oil.  Fry the tofu until any water has absorbed, and the tofu has a legit egg like texture. It’s super easy, you don’t have an excuse not to try it!

~peace~


Bright Beet Smoothie!

Once upon a time, I used to make smoothies like every day, and it was great, but it was also a phase.  My smoothie phase ended a long time ago, because usually you find a type you like and then you fall into a smoothie rut.  I got bored of smoothies and moved on. Something has changed though, because today I made a truly great, truly excellent smoothie (an awesome smoothie creator does not need to be modest) with some unexpected ingredients.  It started the way literally all of my interesting food creations do- I needed to make something with veggies that were getting a bit beyond their best (squishy beets are gross= eww).  So I decided to blend my old beets (do not ask why) then I just started adding ingredients that might belong in a smoothie and the result was really fucking good. ALSO beets contain phytonutrients called betalains which provide antioxidants, and can act as an anti-inflammatory, all the more reason to enjoy.

Image

  • 2 small beets (peeled and chopped)
  • 1 cup (240 ml) frozen berries
  • a banana
  • 1/3 cup apple sauce (80 ml)
  • 2 TB (30 ml) almond or peanut butter
  • 1 TB (15 ml) chia seeds
  • 1 TB (15 ml) grated unsweetened coconut

Blend and enjoy!

Krunchy Kale

For a Christmas stocking stuffer I got a little bag of kale chips, (man those folks know what I like), the chips were super good, super food.  I could have eaten like 9 packs of these kale chips, but store bought kale chips are very expensive, so I decided to shamelessly rip off their idea! Therefore, I made coconut curry kale chips, and mine were even better than the store bought ones (winning), I then went on to make them again the very next day!

Image

Kale chips are super easy to create making it one of the best ways to healthy snack!

  • 1 bunch kale
  • 1 TB coconut oil (melted)
  • 2 teaspoons curry powder
  • 1 hand full dehydrated coconut flakes
  • 1 teaspoon hemp seeds
  • 1 TB nutritional yeast
  1. Preheat oven to 400
  2. Remove the soft leafy parts of the kale from the stem and then tear into chip sized pieces.
  3. Add the melted oil and other ingredients to the kale. Mix well
  4. Bake for 20 to 30 minutes.  Try not the have the kale overlapping on the baking tray as they will get properly crispy if they are layered.

Brussels Sprout with Roasted Tamari Pumpkin Seeds

This week I started working after being unemployed for a period of time (it was a long time no judgement ok).  Now I’m going to be working straight for around 17 (you should probably kill me).  I just want to stay home and cook all day! Ugh, life be like.  One thing working has made me realize is I need to be really organized about with preparing my meals.  Some people are chill to just pick up some food where ever they are, but when you are a health freak in today’s prepackaged, zero nutritional value world that is not really an option.  Since thinking about what I’m going to eat for lunch is one of the only things that keeps me going through a morning of work; I need to make sure it’s really delicious.  So the other day I made brussel sprout salad with tamari roasted pumpkin seeds, and it actually made my morning go by so slowly because all I could think about was when I would get to eat.

My favourite way to enjoy brussel sprouts is to roast them, because boiled brussels are straight up gross, as a kid I wouldn’t even look at brussel sprouts at Christmas I was like potatoes come at me but nowwww I want them both.  Image

  • 2 cups brussels halved
  • 1 teaspoon coconut oil + 1 teaspoon for the pumpkin seeds
  • sprinkle of salt or red pepper flakes
  • 1/2 cup raw pumpkin seeds
  • 1 tablespoon tamari (Tamari is a type of soy sauce in case you were wondering, you can use normal soy sauce instead but I find the flavour of tamari to be the best.)
  • alfalfa sprouts (optional)
  1. Preheat your oven to 400F (200C)
  2. Cut your brussels in half, and combine with coconut oil and salt. Roast for 30-40 minutes.
  3. Heat a pan with coconut oil, when it is hot add pumpkin seeds and tamari. Cook for around 5 minutes or until the seeds are golden
  4. When the brussels are cooked combine with the pumpkin seeds and alfalfa sprouts!
  5. Eat lunch and make everyone who work with jealous

This recipe is really, really easy as obviously evident from reading it, but it is a definite winner.

Image

SPRING ROLLS

Oh my god guys, I am so excited, I made spring rolls! I did not think I could pull this recipe off, but I damn well did! I am really overly excited about this, per usual as food is the only thing that really makes me excited.

Party in my mouth

Party in my mouth

I was not even going to try and make spring rolls, I was going to attempt dumplings, but in the grocery store I could only find spring roll pastry and not dumpling shells, so I was like, close enough.  Now, just to clarify, I usually try to make everything at home, but one time I made beautiful dumplings with homemade shells, and they were awful, and weird and like wayyyyyy to chewy, so this time I realized I needed some store bought wrappers.

Now I looked up how to make spring rolls, and I did not like any of the recipes that I found, so I decided I would do my own thing and I really enjoyed the way it turned out!

What you need:

  • one package spring roll wrappers
  • coconut oil (for cooking)
  • 4 small grated carrots (or 2 large)
  • 1/4 cup (60 ml) sprouted mung beans (or any type of sprout)
  • 1/2 (120 ml) pickled cabbage (I made my own and you can find the recipe on this blog! You can also use store bought or raw cabbage)
  • 6 (approx.) bok choy leaves shredded
  • 1 tsp (5ml) miso paste
  • 1 Tb (15ml) tamari soy sauce
  • 1/2 tsp (2.5ml) salt and pepper (please do not leave out the pepper it makes it a billion times better!)
  1. Steam your grated carrot, shredded bok choy, and mung beans for 10 minutes or until softened, if you are using raw cabbage you should include it in the steaming, but if you are using pickled cabbage leave it separate.

    Ingredients

    Ingredients

  2. Mix the cooked vegetables with the pickled cabbage.  Add the tamari, miso, salt and pepper to the vegetables and thoroughly mix so everything is evenly distributed.

    mix

    mix

  3. Peel apart some of your spring roll pastry.  Lay one piece on a flat surface, scoop about a one tablespoon sized amount of the filling into the middle of the wrapper.
    Wrapper with a scoop of filling

    Wrapper with a scoop of filling

    Wrapper with folded sides

    Wrapper with folded sides


    Fold the sides across each other, and then fold over the end pieces creating a sealed rectangle, future spring roll.

    Future spring roll

    Future spring roll

  4. Heat a frying pan or wok at medium heat with a small amount of coconut oil (or oil of your choice).  When the pan is hot cook the spring rolls until golden on both sides.  When you are cooking the spring rolls it is really nice the veg is already cooked, because then you only have to worry about frying the wrapper.  These are not classic spring rolls but they are 100% delicious so give them a try!

    Finished spring rolls!

    Finished spring rolls!


Sweet, salty pickled cabbage

The newest staple of my diet is pickled cabbage, I am in love with it!

Image

It all started because during the month of November I have been wildly unemployed, leaving me with loads of free time to experiment in the kitchen.  Loads of my invented recipes have been complete fails, that I have unhappily forced myself to eat, as I am to stubborn to waste food but some of the things I have tried this week have been awesome and addicting, I’m looking at you pickled cabbage.  I always thought making anything that involved fermenting was difficult, and required too many weird ingredients.  Last year I made pickled beets that involved lots of vinegar, and apple cider vinegar, the result was REALLY salty and kinda weird, needless to say it was never made again.  However, all you need for this amazing pickled cabbage is cabbage, and salt, pretty damn simple. 

Here is what you do:

  1. Cut or grate (I had more success with the grated batch) your cabbage, an older cabbage is better for pickling.
  2. Add salt to your cabbage, I used a 1/2 teaspoon (2.5 ml) for every 1/4 of the cabbage, but the best way to figure out how much salt you need is to taste test.  The cabbage should taste salty but not disgustingly salty.
  3. Work the salt into the cabbage, a bit like the way you would work with dough but you want to be really forceful! Take out any built up anger you may have on the cabbage! You want to see the juice of the cabbage flowing.  Image
  4. Once your cabbage is nice and broken down, get a metal or ceramic bowl/pot and really pack the cabbage down into the bowl using your knuckles.  Put a plate in the bowl and push it into the cabbage, place something heavy on the plate, I used a can of beans, and then cover with a towel or plastic wrap. 
  5. Put the cabbage somewhere dry and warm for three days to ferment. The result is a salty and sweet, awesome cabbage; great for a topping or just for eating out the bowl (like I do as soon as it’s finished). 

Another fun thing about this is you can add other vegetables to mix up the flavours.  A common addition is carrot, but I know my next batch will have grated beet!


Accidental Eggplant Chips

I had bought eggplant to try and make baba ganoush, but after looking briefly at various recipes I realized it looked a lot harder than what I had thought, so I kept putting it off, leaving my eggplant sitting lonely in the fridge.  I happen to be on a strict budget for food, so with the rest of my vegetables rapidly disappearing, eggplant was one of the only dinner options I had left (that or raw celery). I was too hungry to attempt baba ganoush so I decided to make a roast eggplant sandwich, which would have been great if I had been looking at a recipe for that, however I was looking at recipe for a casserole containing eggplant and many other vegetables, you were supposed to cook the casserole for an hour and a half.  In my hunger stupor I thought since I just had eggplant without the rest of the veg I would try cooking my eggplant for 40 minutes.  It turns out that after 40 minutes the eggplant was extremely wilted and crispy, I thought for a second I had ruined it but after tasting I realized I had made really, freaking delicious eggplant chips.  It turned into a happy eggplant accident. 

Image

  • 1 eggplant
  • 2 tablespoons oil (30 ml)
  • 1 tsp salt and red pepper flakes (5ml)

First preheat oven to 375 F (180 C)

Cut your eggplant into thin strips, lightly oil, add salt and red pepper flakes 

Bake for 40 minutes or until the eggplant is perfectly crispy!

Twice baked stuffed yam

In my fridge had an absolutely giant yam, I have no idea how I looked at it in a grocery store and thought it was good idea to buy a yam that huge, but hey, it happened.  I always do the same things with yam, yam fries duh, because they are amazing, but not that exciting, so to make things a little more interesting I decided I wanted to try stuffing a yam.  I had no idea what one would stuff a yam with, but I had some left over hummus, chick pea and cherry tomatoes, so I thought I would try a vaguely Lebanese inspired recipe.

IMG_0099

  • 1 large yam
  • coconut oil
  • a few small cherry tomatoes
  • 1/4 tsp (2.5 ml) cumin, turmeric and chilli powder
  • 1/4 cup chick peas (60 ml) (I used canned)
  • 1/3 cup (80 ml) hummus

First I rubbed coconut oil and salt on the yam, then I wrapped it in aluminum foil and baked it at 180 C (350 f) for two hours.  Most yams should bake within an hour unless you bought a freakishly large one like I did.

When the yam is soft all the way through take it out of the oven and let it cool.  Once cool, cut it halves and remove the center, leaving about 4 cm (1.5 inch) of yam in the skin.  IMG_0100

Take your hummus, chickpea and spices and mix them in with the yam filling, once nicely mixed scoop the mixture back into the yam and top with cherry tomatoes.  Bake the stuffed yams for 10 to 15 minutes.

.

Finished product!

Finished product!